Taints and Tolerations
Taints provide nodes with the ability to repel a set of pods, allowing you to mark nodes as unavailable for certain pods. A common use case of taints is to prevent pods from being scheduled on nodes undergoing maintenance. Tolerations are applied to pods and allow the pods to schedule onto nodes with matching taints. Once configured, nodes do not accept any pods that do not tolerate the taints.
You can think of taints as having the opposite effect to Node Labels. Taints allow you to mark nodes as not accepting certain pods, while node labels allow you to specify that your pods should only be scheduled on certain nodes.
Palette allows you to apply taints during cluster provisioning. Once the cluster is in a healthy state, taints can be modified on the Nodes tab of the cluster details page.
This guide covers the Palette UI flow.
Taints can also be applied to node pools using the Spectro Cloud Terraform provider.
Prerequisites
- A Palette account with the permissions to create cluster profiles and manage clusters. Refer to the Roles and Permissions guide for more information.
- kubectl or K9s installed locally.
Enablement
-
Log in to Palette.
-
Navigate to the left Main Menu and select Profiles.
-
Create a cluster profile to deploy to your environment. Refer to the Create a Full Profile guide for more information.
-
Add a manifest to your cluster profile with a custom workload of your choice. Refer to the Add a Manifest for additional guidance.
-
Add pod tolerations to the pod specification of your manifest. Refer to the Taints and Tolerations official documentation page for more details.
-
Specify a custom key and custom value.
-
Palette supports the
Equaloperator. -
The effect defines what will happen to the pods that do not tolerate a taint. Kubernetes provides three taint effects.
Effect Description NoSchedulePods that cannot tolerate the node taint will not be scheduled to the node. PreferNoScheduleThe system will avoid placing a non-tolerant pod to the tainted node but is not guaranteed. NoExecuteNew pods will not be scheduled on the node, and existing pods on the node, if any,will be evicted if they do not tolerate the taint. tolerations:
- key: "key1"
operator: "Equal"
value: "value1"
effect: "NoExecute"infoWhen using packs or Helm charts, tolerations can only be specified if they are exposed for configuration in the
values.yamlfile.
-
-
Save the changes made to your cluster profile.
-
Navigate to the left Main Menu and select Clusters.
-
Click on Add New Cluster.
-
Fill in the Basic Information for your cluster and click Next.
-
On the Cluster Profile tab, select the cluster profile you previously created. Click Next.
-
Select a Subscription, Region, and SSH Key on the Cluster Config tab. Click Next.
-
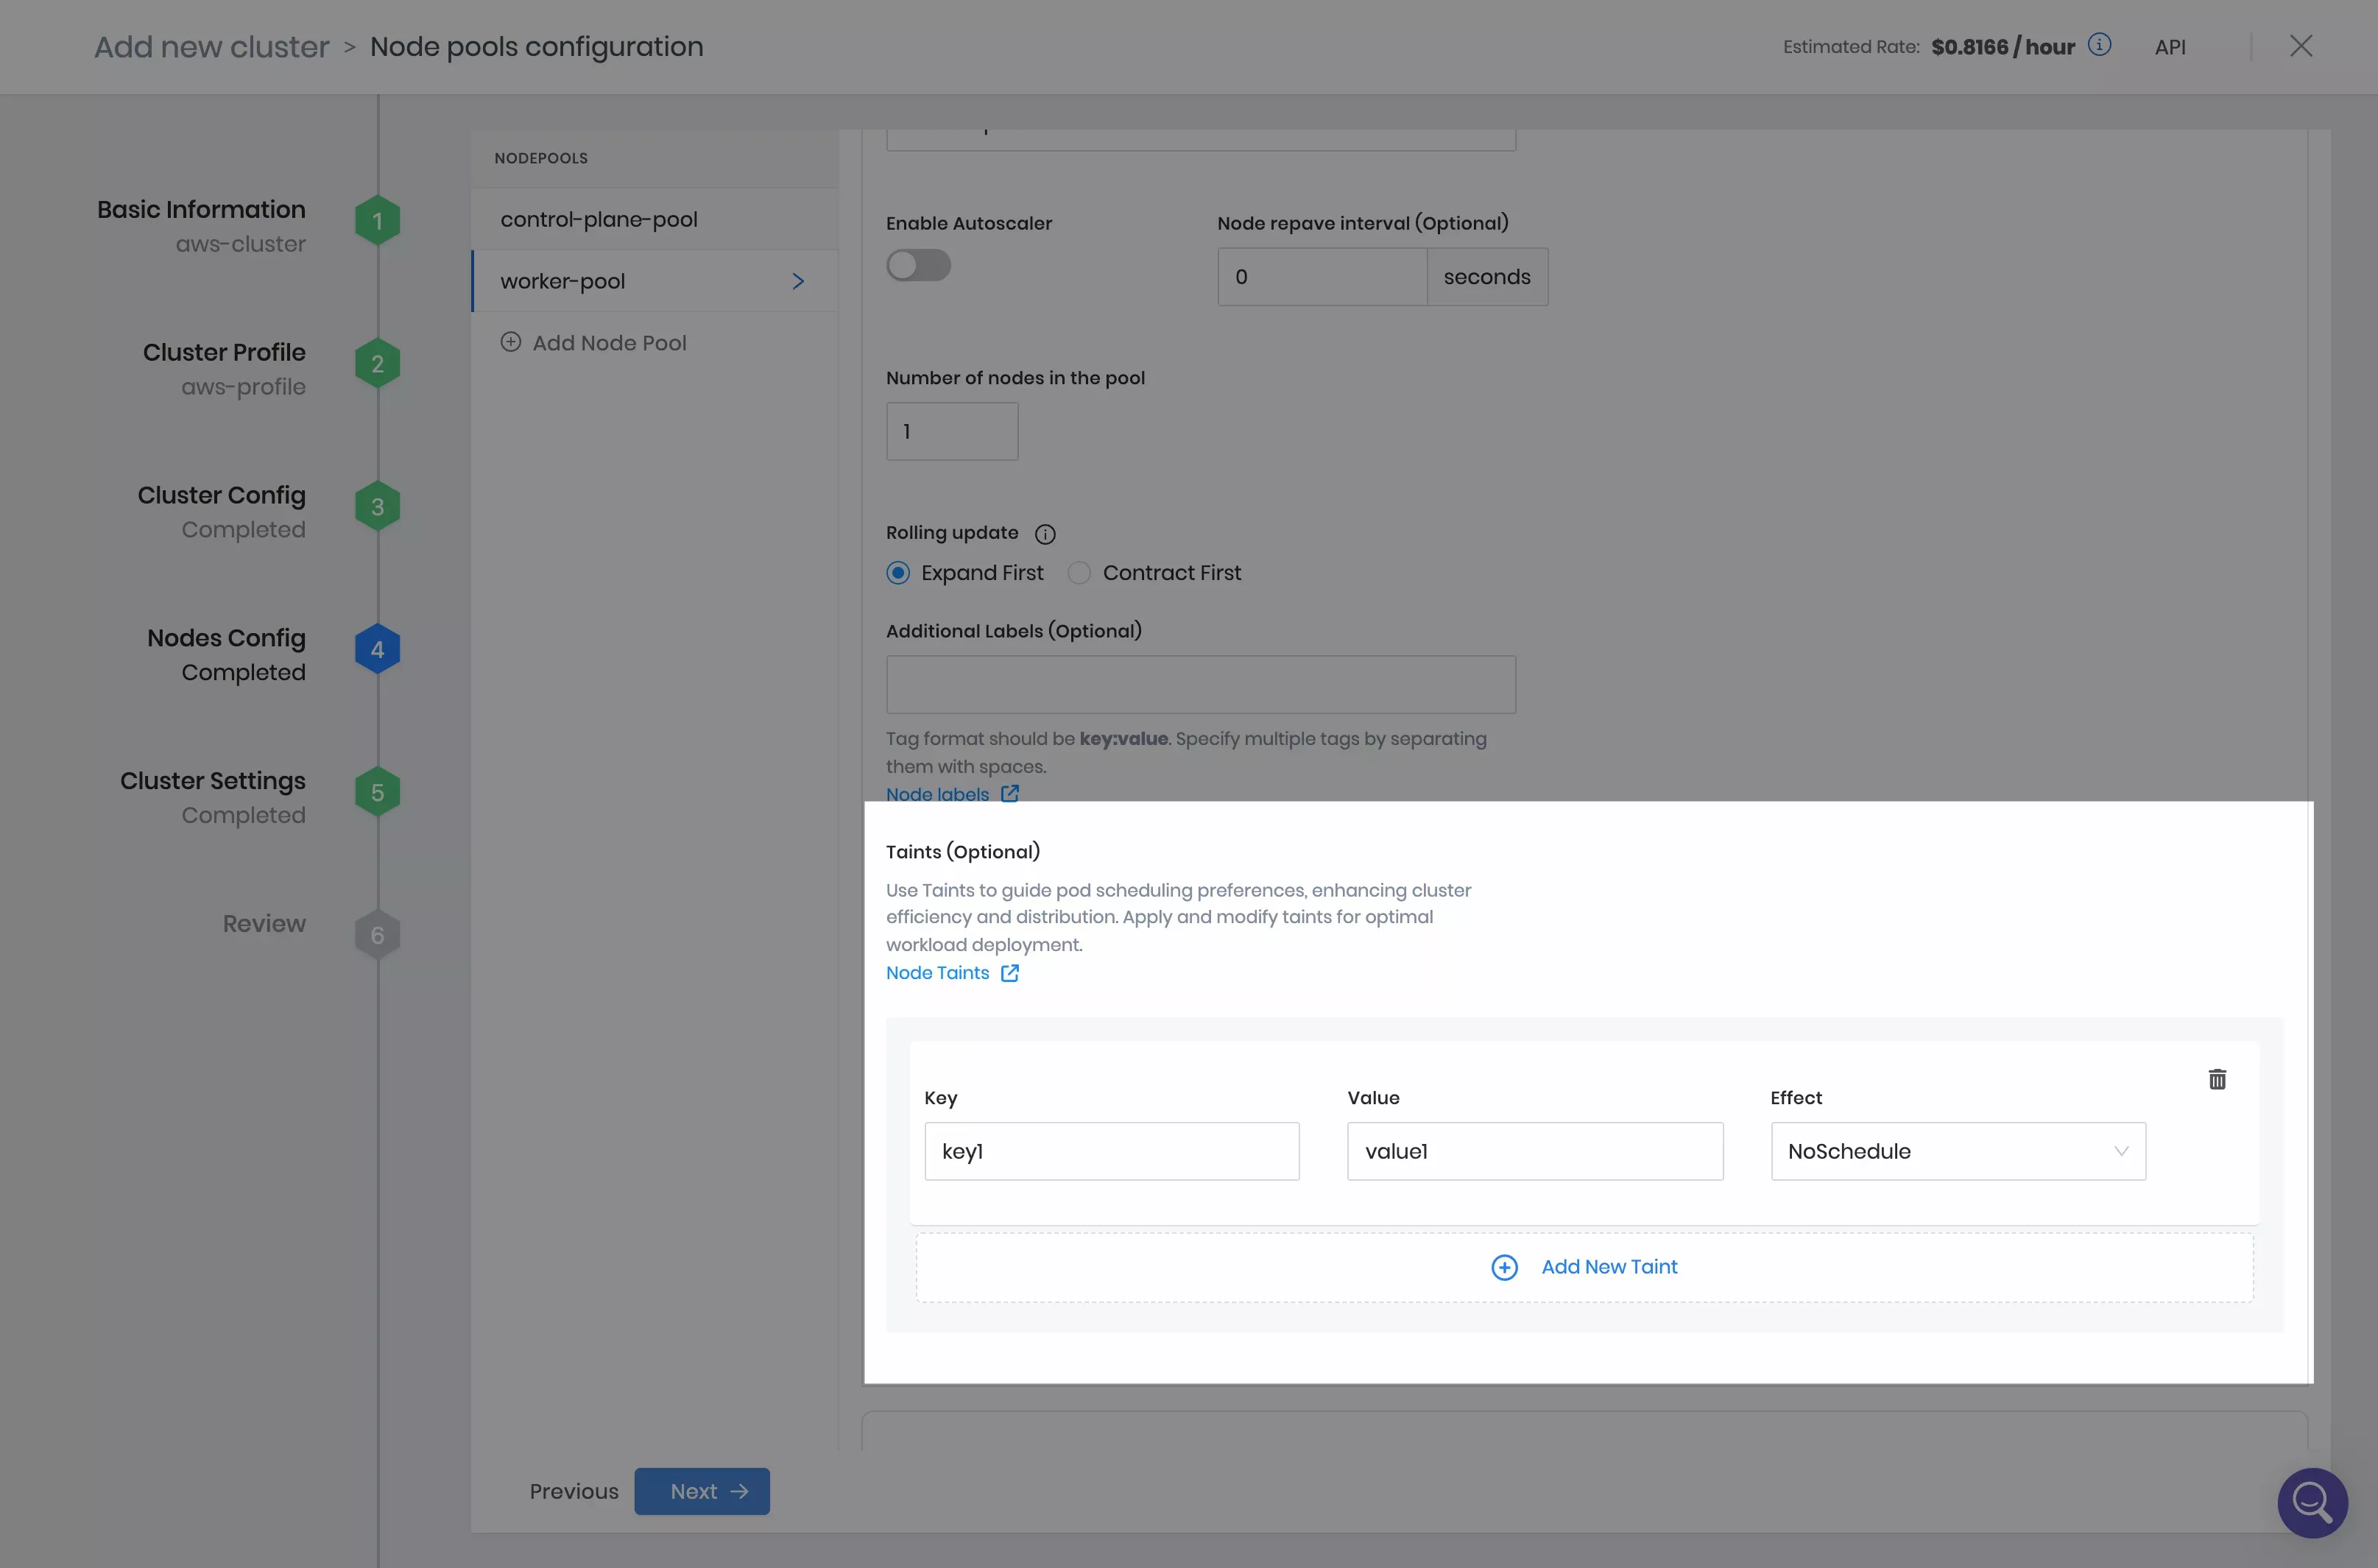
On the Nodes Config tab, configure your control plane pool and worker pools by providing the instance type, availability zones and disk size.
-
The control plane pool and worker pool provide the Taints (Optional) section. Click on Add New Taint and fill in the toleration values specified in your cluster profile. Click on Next.
 info
infoTaints can also be updated on a deployed cluster by editing a worker node pool from the Nodes tab of the cluster details page.
-
Accept the default settings on the Cluster Settings tab and click on Validate.
-
Click on Finish Configuration and deploy your cluster.
further guidanceRefer to our Deploy a Cluster tutorial for detailed guidance on how to deploy a cluster with Palette using Amazon Web Services (AWS), Microsoft Azure, or Google Cloud Platform (GCP) cloud providers.
Validate
You can follow these steps to validate that your taints and tolerations are applied successfully.
-
Log in to Palette.
-
Navigate to the left Main Menu and select Clusters.
-
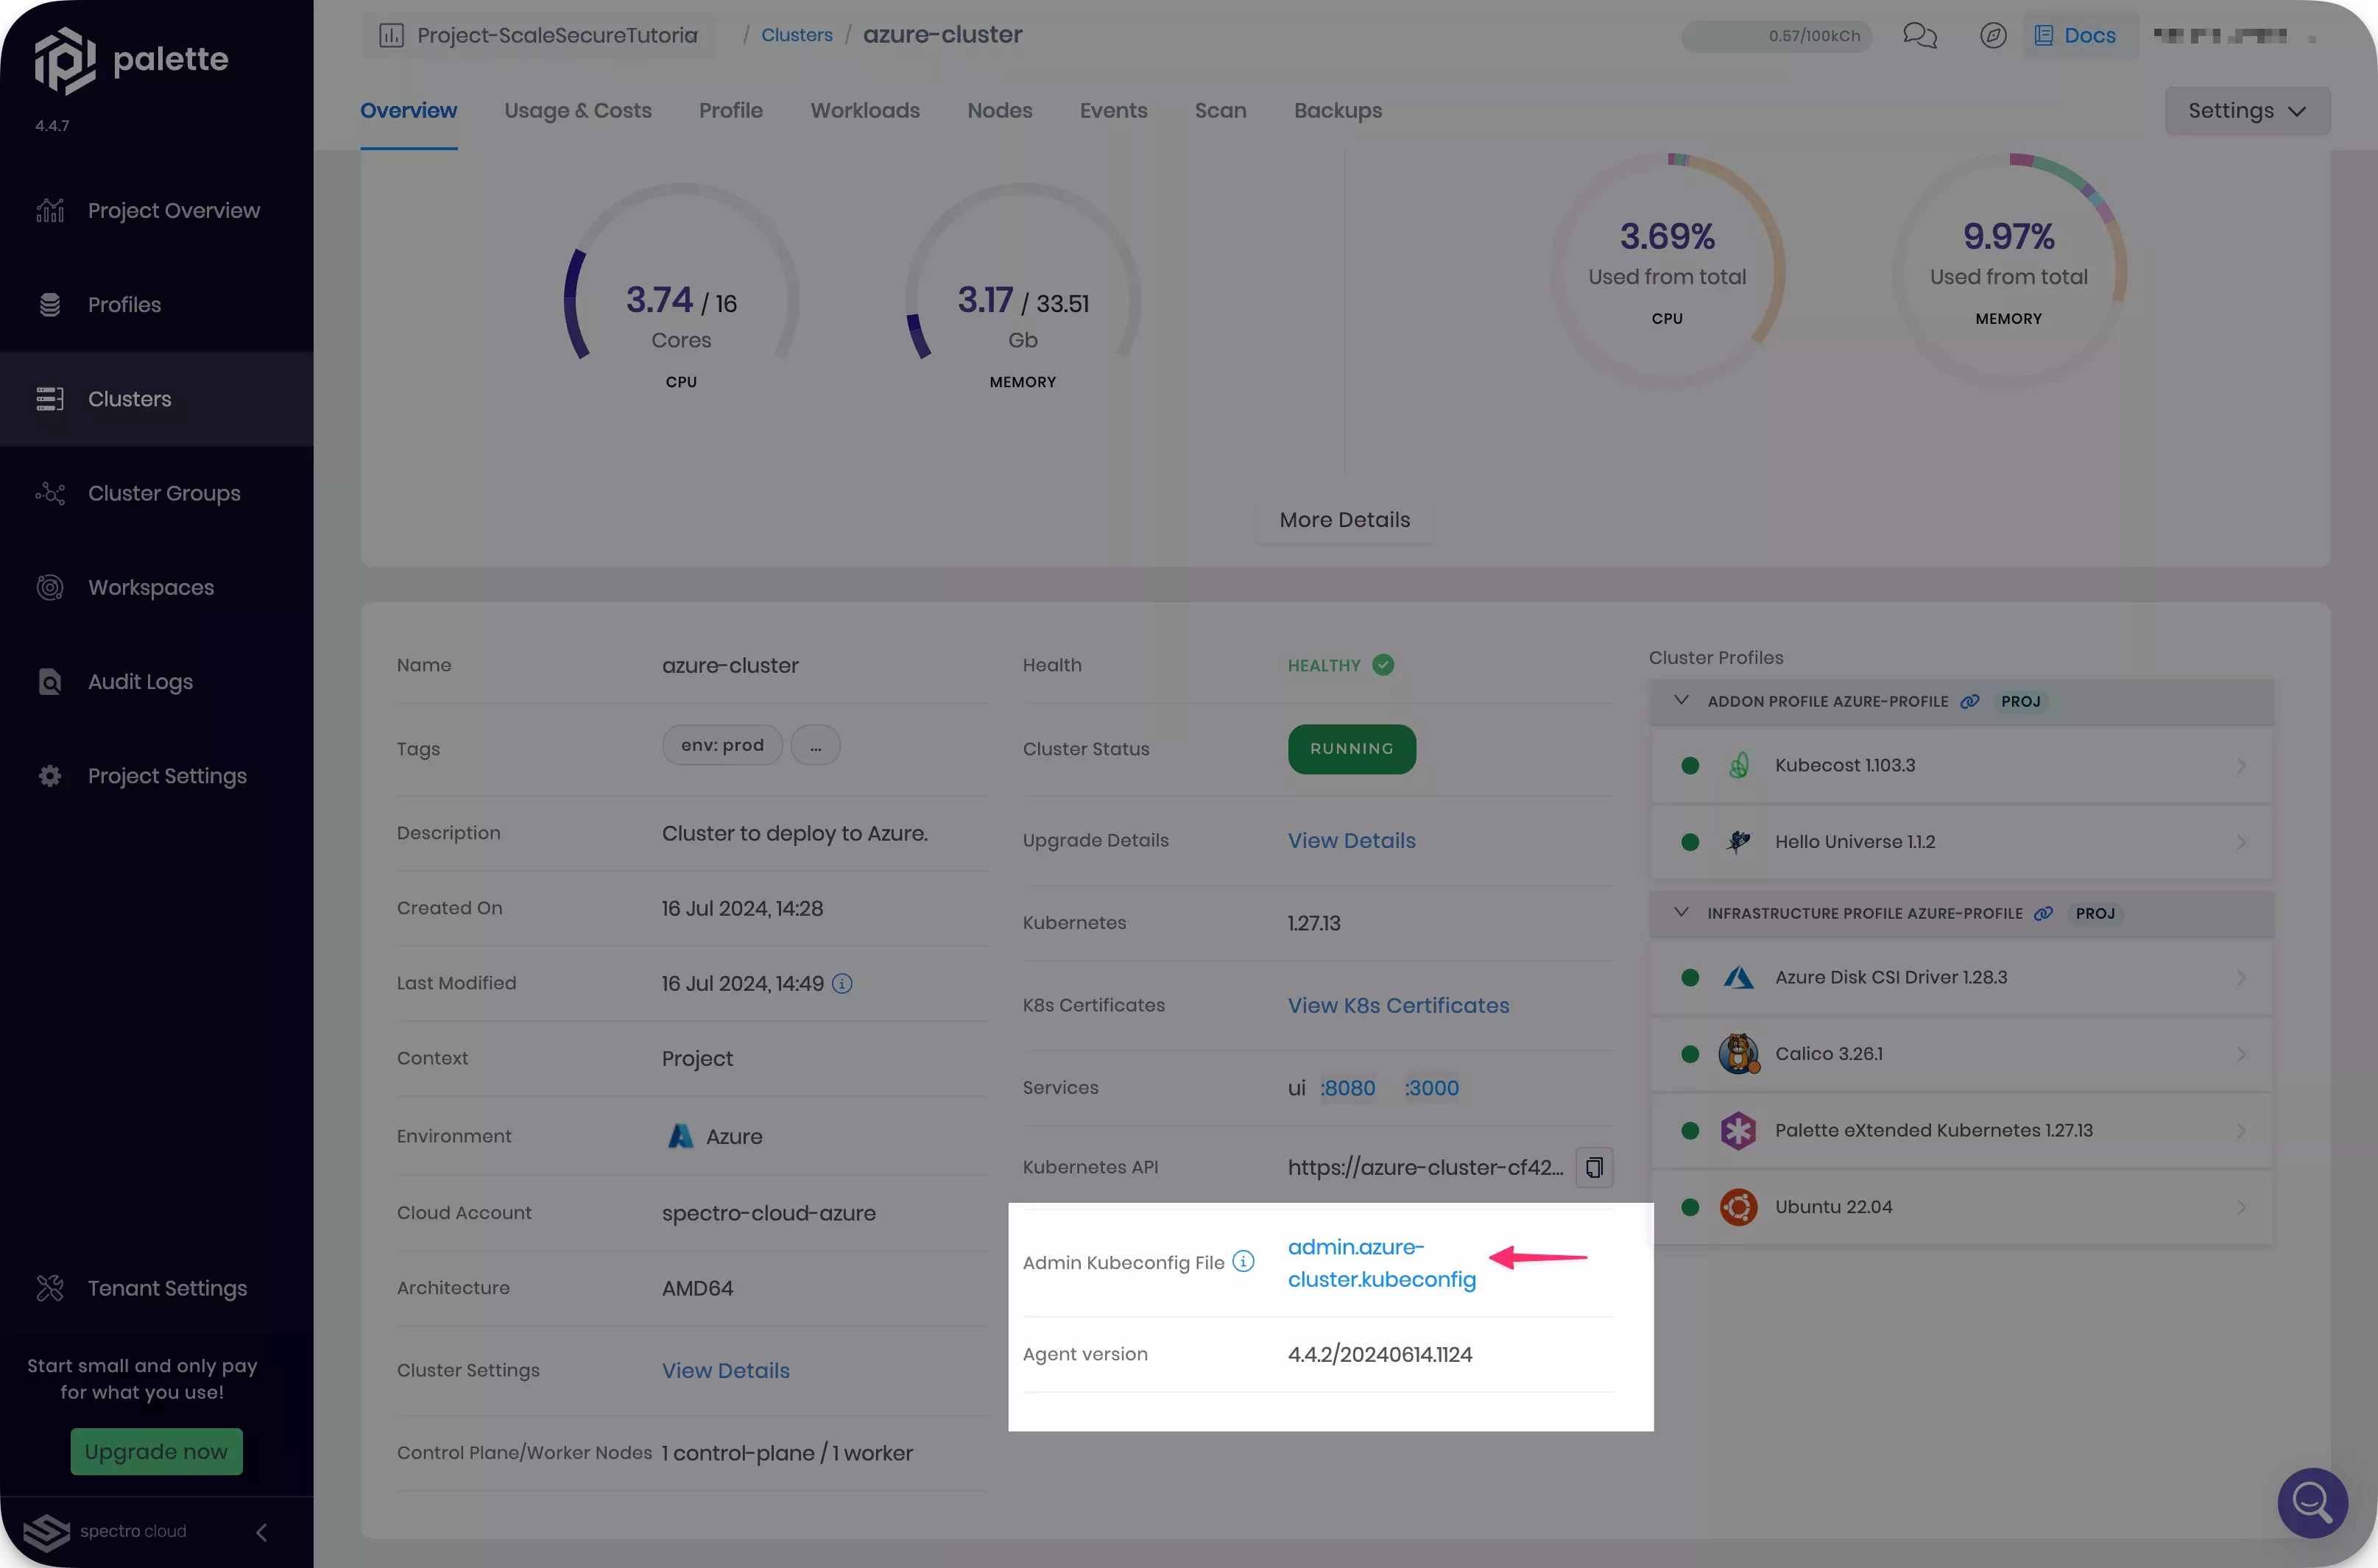
Select the cluster you deployed, and download the kubeconfig file.
-
Open a terminal window and set the environment variable
KUBECONFIGto point to the kubeconfig file you downloaded.export KUBECONFIG=~/Downloads/admin.azure-cluster.kubeconfig -
Confirm the cluster deployment process has scheduled your pods as expected. Remember that only pods with matching tolerations can be scheduled on nodes with configured taints.
kubectl get pods --all-namespaces --output wide --watchtipFor a more user-friendly experience, consider using K9s or a similar tool to explore your cluster workloads.